Friday, November 21, 2014

Superheros - featuring Toni From Designs Flair


Welcome!  Today I want to share with you my first project as part of the Toni From Design Team and a little bit about myself!  

I'm living the simple life out in the country.  I love to cook from scratch and menu plan for a month at a time. I love to play with pretty papers.  Patterns & textures inspire me.  Glitter makes me happy. I am in love with the library and I am a book nerd. Coffee & Whiskey are my drinks of choice. I am a SAHM of 2 busy boys - Noah 6 & Liam 4.5.  I met my husband Clay on an online dating site back in 2006 and its been a whirlwind ever since!  He is an Aircraft Maintenance Engineer for a local helicopter company. 

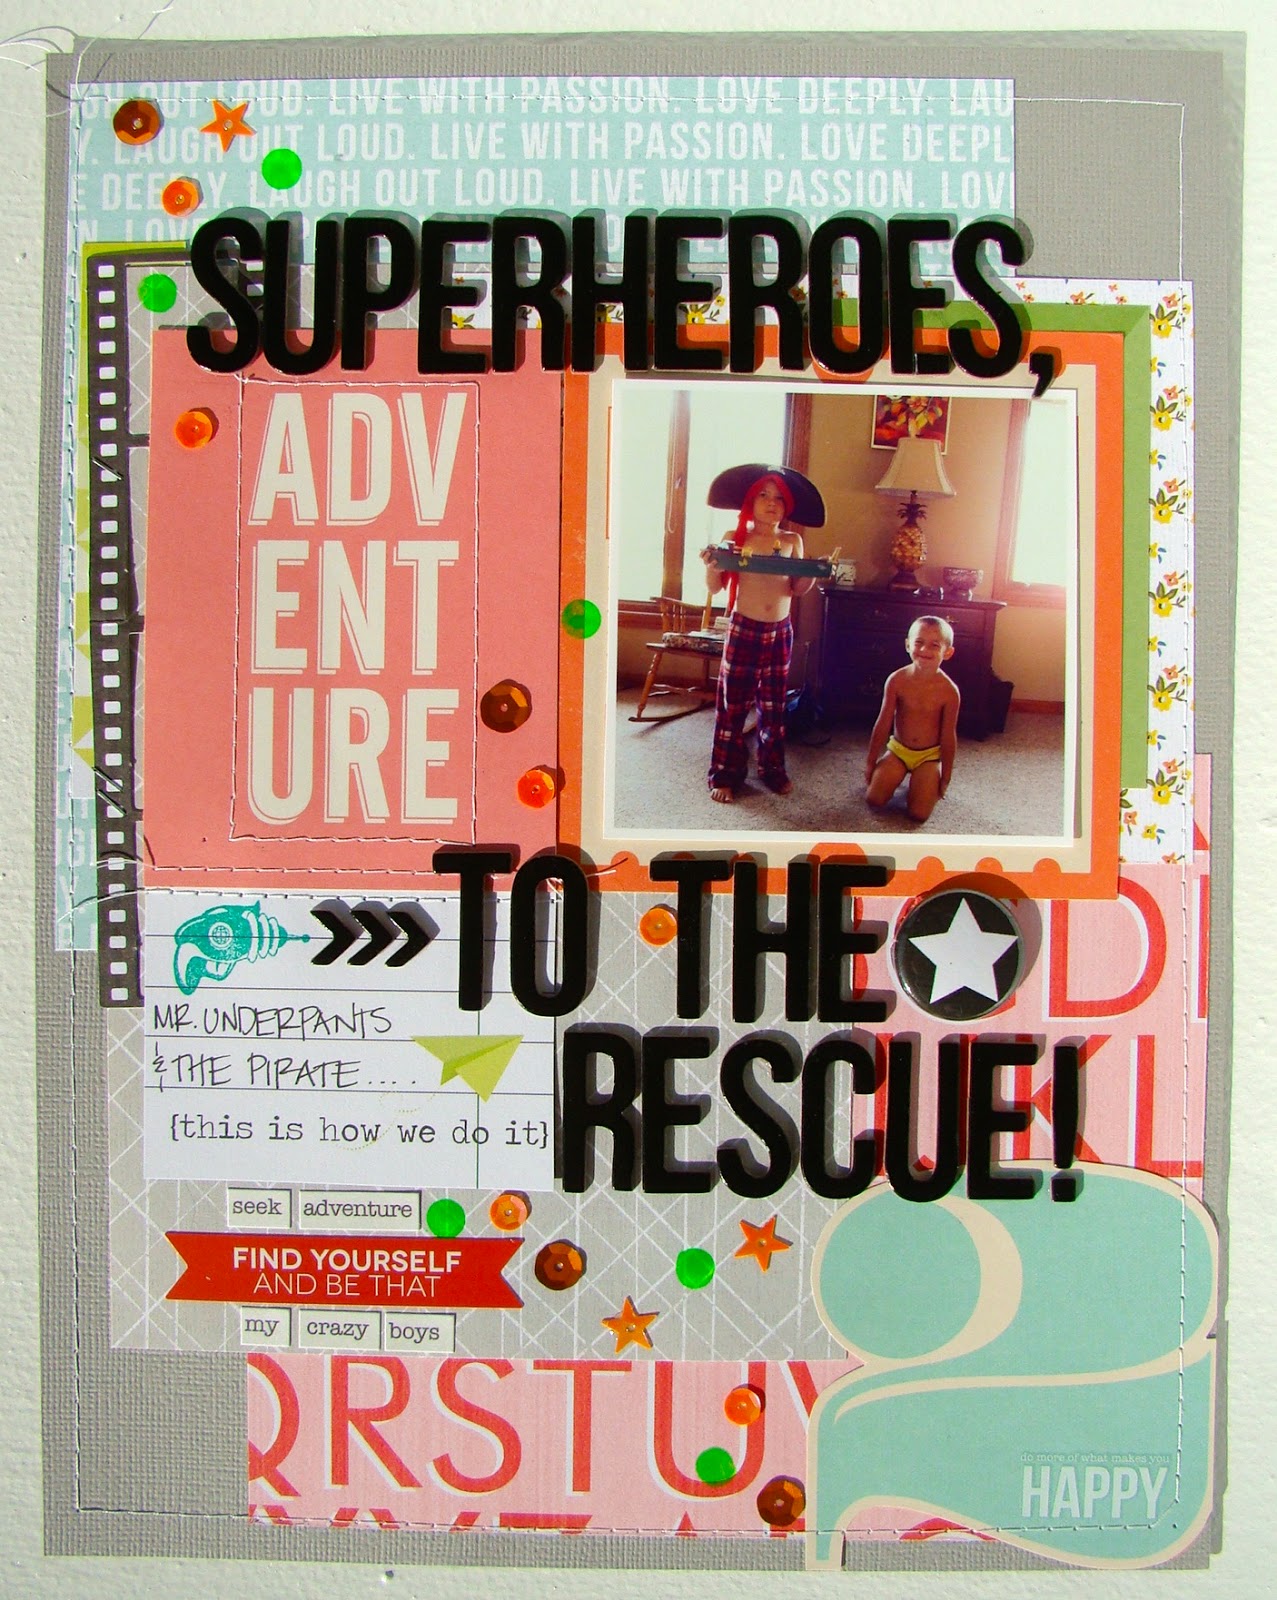
The minute I saw the star flair in the Happy Halloween Flair , I knew I had to have this set!


Here is a close up of the Star flair.  I love how it fits in perfect with the bold black alphas in this title


Don't forget to stop by the shop use my code "DANIELLE" to save 10% off your order of flair!
Photobucket

Monday, November 17, 2014

Exciting News!

I have some exciting news to share with you!  
I was invited to be a part of the new Design Team for 


I will be designing projects using Toni's awesome flair along with a few other talented ladies - Jen Boumis, Kathy Skou & Toni From!

Here are a few flair sets that are in her shop that I love and if you use my code " DANIELLE " you will save 10%!!!


Don't forget to check out the blog for news, updates and lots of amazing work!!!!

Photobucket

Saturday, September 27, 2014

Some New Layouts....

Where did the summer go? I can't believe fall is here!  I really neglected my blog over the past few months... I apologize, but today I want to share with you a few layouts I made over the summer using my Studio Calico Penny Arcade Kits

After I placed the word "click" under the photo, I went back to the October Afternoon sticker sheet, and fussy cut the sticker sheet where I got the word from.. and thats how I made the outline "click" above the photo.

For this layout, I challenged myself to use the scraps that were left on my desk from the kit... this layout officially "killed" the kit!

The "Here and Now" die cut that was in the kit, I misted with water, then used a paintbrush and my Lime Dylusions Mist, and painted it for the watercoloured look.


This layout also used random scraps from my desk that were left from this kit.

Thanks for taking a look!
Photobucket

Friday, August 15, 2014

Salsa Cheese Meatloaf

Preheat oven to 375F

Ingredients 
  • 2lbs - Gound Beef
  • 1 - Egg lightly beaten
  • 1/2 - 1 cup - Salsa
  • 1/2 cup - Red Pepper Chopped
  • 1/2 cup - Quick Cook Oats
  • 1/4 cup - Chopped Onion
  • 1/2 - 1 cup - shredded cheese (we use whatever is in the fridge, Gouda, Cheddar etc.)
  • 1 tsp - Salt
  • 1 tsp - Parsley
  • 1/2 tsp - Garlic Powder or 1 clove minced Garlic
  • 1/4 tsp - pepper
  • 1/3 cup - Italian Bread Crumbs (they have parmesan cheese mixed in)
Directions
  • Except for the cheese, mix all the ingredients together with your hands
  • Place 1/2 mixture in a loaf pan, make a "well" and put cheese in, then top with the remaining mixture on top
Topping
  • 1/3 cup - Ketchup
  • 1tbsp - Mustard
  • Mix together and spread over the top of the meatloaf
Bake 1hr

Note: this recipe works great doubled so you can freeze 1 for later!


Photobucket

Thursday, August 14, 2014

Mashed Potatoes


Ok, seriously, who doesn't LOVE mashed potatoes?
Today I want to share with you my Mom's recipe.  

First off, when I mash potatoes I use an entire 10lb bag, that way I can portion it out and freeze using my FoodSaver. (See this Post)

You can cut this recipe in half, no problem

Mashed Potatoes

  • 10lb bag of potatoes - I prefer Yukon Gold but will also use red or white or a mix
  • 1 brick of Cream Cheese - softened
  • 1 500ml tub of Sour Cream
  • 1/4 of brick of butter
  • milk - I have never measured this... I just pour in 
  • salt / pepper
  • OPTIONAL -  ranch dressing or shredded cheese
I don't peel my potatoes (too much work, and we love the skins anyway)

  • Cut potatoes into chunks
  • Boil (I use a HUGE pot, if you don't have that use several pots)
  • When fork tender, drain
  • Put the Butter & Cream Cheese in the pot, then dump potatoes on top.... let sit a few minutes so the hot potatoes help melt/soften butter and cream cheese
  • I then start to mash with my hand masher... I don't get too fussy about this, we like a bit up lumps.
  • Next add in the Sour Cream and a bit of Milk
  • I use my Hand Mixer to mix this up.  From here, I keep adding milk until I get the desired creaminess. 
  • Add in some salt/pepper - I go light, because I let people salt their own food
  • Add in the shredded cheese or ranch if you are using it
From here you can serve up for dinner OR I will put in a Corning Ware dish, and bake for 30min at 350F and it makes it golden!

Other Cooking Options

  • For a crowd - I make these the day before, and place in fridge.  The next morning, I pull out my crock pots (2) place 1 tbsp of milk in the bottom and then place the potatoes in, put lid on and cook on low all day.  This frees up your time esp on Thanksgiving or Christmas Day!!
  • Freeze - I portion these up in freezer bags (see here) and smooth out flat, then seal.  NOTE:  when you thaw them, and place in a dish for baking, they will seem really watery - Don't Panic .... just stir them up and bake uncovered for 30-45 min at 350F
  • BBQ - What?!! yes! BBQ..  I will pull out one of my bags that I froze and let partially thaw, then I will layer 2 pieces of aluminum foil on top of each other, use the back of a spoon an spread butter on the bottom, place potatoes on top, then seal into a packet... place on BBQ, (also do this with frozen veggies) and it will heat up while you are cooking the meat... and all the mess is outside and not in your kitchen!
  • Pan Fry - we take leftover mashed potatoes, put a bit of butter in the bottom of the fry pan, and heat up!
If you try my recipe, I'd love to hear what you think!


Photobucket

My Favourite Small Kitchen Appliance


If you follow my Instagram acct, then its no secret, I love to cook! What I love even more, is to cook in large batches, and freeze things in order to tame the chaos that comes at dinner time!

The absolute 1 thing that I could not live without in my kitchen is my FoodSaver.
(FYI this is my own opinion, I am not being sponsored by this company)

You can read more about it HERE

I purchased mine a Costco several years ago in a bundle pack that came with a Marinade Dish (which totally rocks for quick marinading) and lots of refills

Here are a few (crappy) pics from my kitchen 


Double Stuffed Potatoes
 (I bake a 10lb bag of potatoes,  double stuff them, then flash freeze on a cookie sheet first then put them in the vacuum bags)

Shredded Cheese
(When I menu plan for the month, I buy all the cheese I need for recipes, then put it through my food processor, then measure out, write out the amount of cheese thats in it, what recipe it goes to, then seal & put in the fridge)

Mashed Potatoes
( I cook a 10lb bag up and make my potatoes, then pre-measure into the freezer bags for dinners)

Here is the inside of my garage fridge. 
Also when we buy our meat, we portion it out as soon as we get home from the grocery store.  

Other foods I vacuum seal & freeze
Chili
Soup
Stew
Spaghetti Sauce
Fruits/Veggies

Items I vacuum seal & keep in cupboard
Icing Sugar
Brown Sugar
Coffee
(i just use the bags for this and lay flat)

In the fridge
Cheese


Photobucket

Saturday, August 2, 2014

Organizing My Shipping Tags

I just wanted to share with you a quick post, showing you how I organize all my different sized shipping tags.


I love using shipping tags on my Scrapbook layouts & Project Life spreads for layering and/or journaling on

Thanks for looking!

Photobucket

Thursday, July 24, 2014

My Sweet Peony


I have another layout to share with you today using older papers and mixing them with new embellishments. 

I love all the pinks and the hit of navy.

I am in love with Jillibean Wood Sprinkles!

and I cannot get enough of gold paper clips right now.  I am also sad that this is my last Maya Road butterfly.

Thanks for taking a peek!
Photobucket

Wednesday, July 23, 2014

Totally Cool

Here is a quick layout I put together using up some of my older papers, and mixing in some of my newer embellishments


Thanks for looking!

Photobucket

Tuesday, July 22, 2014

Using Pink On A "BOY" Layout...

What?!!! Use Pink on "Boy" layouts? 

Yes! You heard correct!
I want to share with you 3 layouts I created using pink on my boys layouts.  Granted, I know my layouts are a bit "in your face" using pink with these 3 layouts, but... maybe you can pull  some ideas from these to incorporate some bits of pink to your layouts.

I love pairing pink, yellow & orange together.
It makes a great summery colour combination.

The Navy & Woodgrain help add a masculine touch to this layout with all the pink

The Lime Green in this layout is a little unexpected hit of colour that breaks up the hot pink & light pink

I hope that this post inspires you to not be afraid to add some pink to your layouts!  Whether it be just a subtle hit, or a more bold touch, its a nice unexpected hit of colour in a sea of the typical blue, red, yellow & orange colours used for boy layouts!


Photobucket

Wednesday, July 2, 2014

A Jeep Ride

Lately, I have been trying to make a dent in my stash of pattern paper, so I grabbed 5 sheets of random paper and sat down and created this!


How is your pattern paper stash?

Photobucket

Tuesday, July 1, 2014

All About A Boy


This summer I have decided to use up some of my collection packs I have been hoarding!

  Today I want to share with you all the layouts I created using only the Echo Park All About A Boy Collection Pack, along with a few embellishments.

I made a total of 5 layouts using this collection. 

 In the end I had some stickers left and 1 sheet of patterned paper left.


And here are the close ups


Thanks for looking


Photobucket
Related Posts Plugin for WordPress, Blogger...